說明:如果想在開發一個新專案時,就能事先幫我們建立好自己要的雛
型架構(例如 Struts 2),及預先幫我們作好一些相關設定,即可利用
此工具先將我們開專案前的一些基本架構 prototype 及相關檔案預先
建立起來。
1. 寫這篇的原因是因為在網址:
http://struts.apache.org/2.x/docs/ready-set-go.html
Run the Maven Archetype(請參考上面網頁的這項)
Run 了那段命令結果出現下列訊息,
Error creating from archetype,查了結果是因為 remote server 沒這個
archetype,也查其他 remote server 也沒這個檔案
(struts2-archetype-starter-2.0.9-SNAPSHOT.jar),要到 google 才找得
到,最近再上去這 repository remote server
http://people.apache.org/repo/m2-snapshot-repository
已更新到 2.0.11.2-SNAPSHOT 版了,所以它的指令的這段
-DarchetypeVersion=2.0.9-SNAPSHOT 應該要改成
-DarchetypeVersion=2.0.11.2-SNAPSHOT 才可以 RUN,當然也藉這個機會來
介紹一下如何使用 Maven 建立自己的 archetype。
2. 這裡講到的是一般我們會引用以前曾經開發過的 project,因為都會引用一
堆 library,跟一堆有的沒的設定,如果在開發新專案時又會用到類似架構
就不用在重頭來一次,那還得花一些時間,而用 maven 建立自己常用架構
的 archetype 就可以省去我們初始建立專案的工作,當然底下要講的跟如
下圖執行的 maven install 是不太一樣的目的
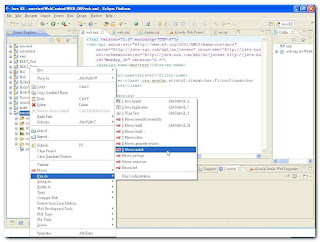
這個是你開發好你的程式後,讓其他人可引用你的 library,一般會在
pom.xml 裡的內容標籤如下方式引用
<dependencies>
<dependency>
<groupId>junit</groupId>
<artifactId>junit</artifactId>
<version>3.8.1</version>
<scope>test</scope>
</dependency>
.
.
<plugins>
<plugin>
<artifactId>maven-compiler-plugin</artifactId>
<configuration>
<source>1.6</source>
<target>1.6</target>
</configuration>
</plugin>
…
雖都安裝進 repository 但我們的目的是要能夠建立專案的雛型架構。
3. 我會以我的這篇 手工打造 Struts 2 應用程式 的例子來當雛型架構,建立
自己的 struts2 archetype。
4. Maven 的安裝請參考
http://maven.apache.org/download.html#Installation
Maven 的使用請參考
http://maven.apache.org/guides/getting-started/maven-in-five-minu
tes.html
5. Eclipse plugin m2eclipse (Maven 的 Eclipse plugin)
請執行 eclipse IDE Menu 的 Help-->SoftWare updates
然後按 Add Site Button 輸入網址
http://m2eclipse.sonatype.org/update/ ,即可安裝 m2eclipse
6. archetype 目錄結構的內容請參考
http://maven.apache.org/guides/introduction/introduction-to-the-s
tandard-directory-layout.html
7. 先了解一下我要建立自己 struts2 archetype 的目錄結構內容,這是要建立自己的 archetype,目錄結構跟步驟 6有些不太一樣
amaven_struts2
|-- pom.xml
`-- src
  `-- main
      `-- resources
          |-- META-INF
          |   `-- maven
          |       `--archetype.xml
          `-- archetype-resources
              |-- pom.xml
              `-- src
                  |-- main
                  |   `-- java
                  |       `-- DataOBJ.java
                  |       `-- ErrorMesg.java
                  |       `-- Search.java
                  |   `-- resources
                  |       `-- struts.xml
                  |   `-- webapp
                  |       `-- WEB-INF
                  |           `-- web.xml
                  |       `-- display.jsp
                  |       `-- error.jsp
                  |       `-- ser.jsp
                  `-- test
                      `-- java
                          `-- SearchTest.java
8. 由步驟 7,我會先建立一個目錄 amaven_struts2,這目錄底下會有 pom.xml
及 src 子目錄,而這目錄的 pom.xml 內容如下(這是你下指令 mvn
install 到 local repository 執行時的 pom.xml 設定):
<project>
<modelVersion>4.0.0</modelVersion>
<!-- 通常會形成你的 package,在 repository 通常會形成目錄 -->
<groupId>tw</groupId>
<!—你的 archetype 名稱在 repository 通常會形成目錄 -->
<artifactId>ted-struts2</artifactId>
<!-- 你的 archetype 版本在 repository 通常會形成目錄 -->
<version>1.0-SNAPSHOT</version>
<!—包裝成 jar 檔 -->
<packaging>jar</packaging>
</project>
所以當你 install 到你的 local repository 時,一般預設在如下的目錄
底下,ted 是我登入電腦的帳號名稱,因此會有底下的檔案
C:\Documents and
Settings\ted\.m2\repository\tw\ted-struts2\1.0-SNAPSHOT\ted-strut
s2-1.0-SNAPSHOT.jar
而另一個 pom.xml 為
amaven_strust2\src\main\resources\archetype-resources\pom.xml
這個 pom.xml 是 prototype pom.xml,這是讓你下指令
mvn archetype:create 時,會在你建這專案原型的目錄下產生一個 pom.xml ,而這個設定檔就是你之後要執行指令(mvn package 等等)時的相關設定檔
這檔案重點內容如下:
<project>
<modelVersion>4.0.0</modelVersion>
<!-- 抓取你下指令時的 groupId,我會舉例為 tutorial -->
<groupId>${groupId}</groupId>
<!-- 我一樣會在下指令時指定為 tutorial -->
<artifactId>${artifactId}</artifactId>
<!-- 包裝成可部署應用程式的 war 檔 -->
<packaging>war</packaging>
<!-- 可以在建立專案時指定版本 -->
<version>${version}</version>
<name>my project</name>
<url>http://www.mycom.tw</url>
<dependencies>
<!-- 會用到 junit 的 library-->
<dependency>
<groupId>junit</groupId>
<artifactId>junit</artifactId>
<version>3.8.1</version>
<scope>test</scope>
</dependency>
<!-- 會用到 Struts 2 的 library-->
<dependency>
<groupId>org.apache.struts</groupId>
<artifactId>struts2-core</artifactId>
<version>2.0.9</version>
</dependency>
<!-- 會用到 postgresql JDBC 的 library -->
<dependency>
<groupId>postgresql</groupId> <artifactId>postgresql</artifactId>
<version>8.3-603.jdbc4</version>
</dependency>
<!--會用到 Servlet & Jsp 的 library-->
<dependency>
<groupId>javax.servlet</groupId>
<artifactId>servlet-api</artifactId>
<version>2.4</version>
<scope>provided</scope>
</dependency>
<dependency>
<groupId>javax.servlet</groupId>
<artifactId>jsp-api</artifactId>
<version>2.0</version>
<scope>provided</scope>
</dependency>
</dependencies>
<build>
<finalName>${artifactId}</finalName>
<plugins>
<plugin>
<artifactId>maven-compiler-plugin</artifactId>
<configuration>
<source>1.6</source>
<target>1.6</target>
</configuration>
</plugin>
<!-- 這個 plugin 可以讓我們在 command 直接下
mvn jetty:run 測試我們的應用程式,部署到 Web
Application Server 前可先用此測試,預設 port 為 8080 -->
<plugin>
<groupId>org.mortbay.jetty</groupId>
<artifactId>maven-jetty-plugin</artifactId>
<version>6.0.1</version>
<configuration>
<scanIntervalSeconds>10</scanIntervalSeconds> </configuration>
</plugin>
</plugins>
</build>
</project>
9. 而檔案
amaven_strust2\src\main\resources\META-INF\maven\archetype.xml
內容如下
<archetype>
<!-- id 跟你的 pom.xml 的 artifactId 值一樣 -->
<id>ted-struts2</id>
<!-- 底下的標籤請參考步驟 6 -->
<sources>
<source>src/main/java/DataOBJ.java</source>
<source>src/main/java/ErrorMesg.java
</source>
<source>src/main/java/Search.java</source>
</sources>
<resources>
<resource>src/main/resources/struts.xml
</resource>
<resource>src/main/webapp/WEB-INF/web.xml
</resource>
<resource>src/main/webapp/display.jsp
</resource>
<resource>src/main/webapp/error.jsp
</resource>
<resource>src/main/webapp/ser.jsp
</resource>
</resources>
<testSources>
<source>src/test/java/SearchTest.java
</source>
</testSources>
</archetype>
檔案 amaven_strust2\src\main\resources\archetype-resources\src\main\we
bapp\WEB-INF\web.xml
及
amaven_strust2\src\main\resources\archetype-resources\src\main\re
sources\struts.xml
及 source code 請參考我附上的 jar 檔
10. 在 dos command 切換到目錄 amaven_struts2,下指令如下圖
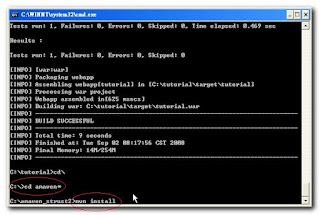
執行完成後你會在你的 amaven_struts2 目錄下會有 target 目錄,而
target 目錄下會有這個檔案 ted-struts2-1.0-SNAPSHOT.jar 以及我們的
local repository 的目錄 C:\Documents and
Settings\ted\.m2\repository\tw\ted-struts2\1.0-SNAPSHOT 下也會有
一樣的檔案 ted-struts2-1.0-SNAPSHOT.jar,我們已成功的將我們自己的
archetype 裝進 local repository 了,那麼如果別人也要用我們的
archetype 該怎麼作呢,很簡單只要給他你的 archetype 這檔案
ted-struts2-1.0-SNAPSHOT.jar,請他下指令裝進他的 local repository
如下圖,我把這檔案 copy 到 C 槽底下,
-DgroupId=tw -DartifactId=myarchetype -Dversion=1.0.0
-Dpackaging=jar 以上參數你可自行指定
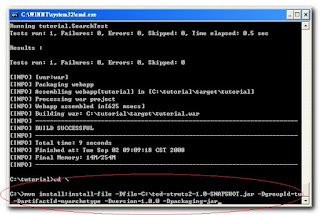
執行完成後 local repository 目錄會有
C:\Documents and Settings\ted\.m2\repository\tw\myarchetype\1.0.0\
myarchetype-1.0.0.jar 檔案
別人一樣可以在他電腦裡執行你的 archetype,當然你也可以放到你的網站
讓大家執行(相關資訊就請參考 Maven 網站)。
11. 回到 Eclipse(如未裝 Eclipse plugin m2eclipse 請回到步驟 5),如下圖選
Menu 的 File-->New-->Project
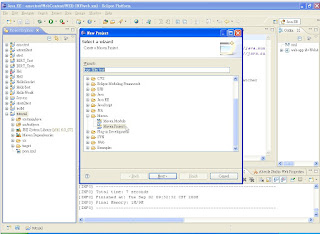
選 Maven 的 Maven Project,按 Next,下一畫面再按 Next,如下圖
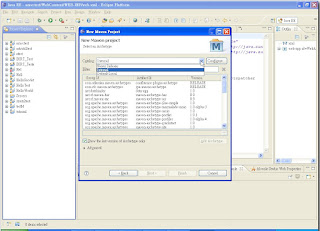
如這三個項目都沒你 archetype,我們回到 Menu 的
Windows-->Preferences 如下圖
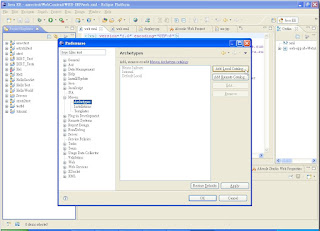
選 Maven 的 Archetypes,按 Add Local Catalog,選檔案名稱
archetype-catalog.xml,這檔案請自行建立,內容如下
<?xml version="1.0" encoding="UTF-8"?>
<archetype-catalog>
<archetypes>
<archetype>
<groupId>tw</groupId>
<artifactId>ted-struts2</artifactId>
<version>1.0-SNAPSHOT</version>
<description>ted struts2</description>
</archetype>
</archetypes>
</archetype-catalog>
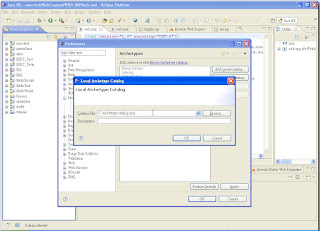
按 OK,再按 OK
12. 我們在重建 Maven Project,重複上面步驟,這時請選擇
Local C:\ archetype-catalog.xml,如下圖
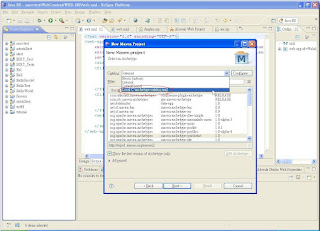
按 Next 如下圖
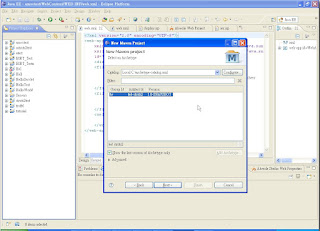
按 Next 如下圖
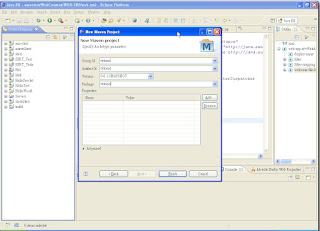
輸入 Group Id,Artifact Id,Package,按 Finish,如下圖
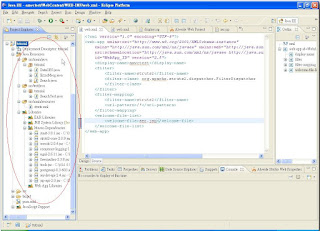
我們 Struts 2 的雛型架構就完成了,是不是很方便。
13. 還記得我們在步驟 8 底下有提到 maven-jetty-plugin,我們在
dos command 下指令,建立 ted-struts2 archetype 如下圖
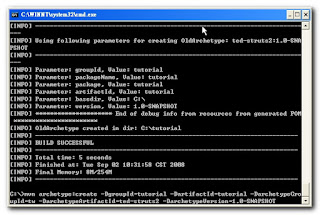
建立完成後,切換到目錄 tutorial,下指令 mvn jetty:run 要下這指令之前請確定你 8080 port 沒被佔用,因為他預設是用 8080 port,
然後再用瀏覽器網址輸入 http://localhost:8080/tutorial
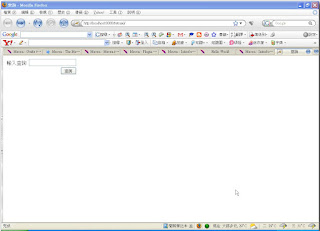
輸入王查詢
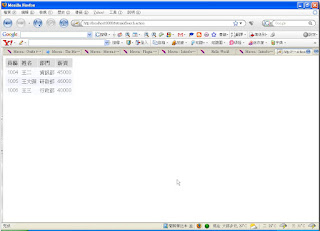
即可知測試 OK
14. 當然我們要包成 war 可以部署到應用程式,執行 Maven Package 如下圖
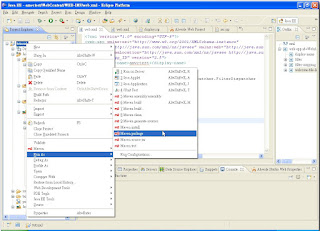
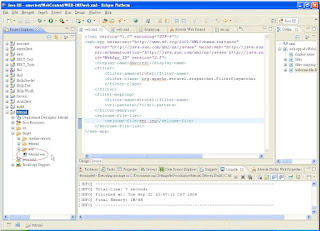
在 target 目錄下會有 tutorial.war 及可部署到應用程式了,如下圖
相關檔案下載


